
Your quest for an organic, home-grown lifestyle may also lead you to brewing your own beer. Part of the home-brewing process is using hops to adjust the flavor, and you can grow your own hops and keep them organic at the same time.
By planting your own hop vines, you’ll have total control over what goes into prepping the soil, the fertilizer, watering, pest control and their eventual harvest. Each hop plant is grown from a rhizome, a root piece from a mature plant. From there, you’re on your way to a great organic beer.
Even beyond beer-making, growing hops is a win-win for organic enthusiasts since they are said to have several medicinal properties. Your organic hops can be used as a sleep or digestive aid. They are also said to help fight bacterial infections. Additionally, hops can also be used in textile manufacturing and in papermaking. Thanks to their high fiber content, hop shoots can be used as a source of food, too.
In your initial planting of hops, you’ll need to buy rhizomes from a supplier or local brewing company. Fresh rhizomes are usually only available in the spring since that’s the time when growers will harvest the rhizomes from their mature plants and ship them to suppliers.
Selection of Hops Variety
Depending on your plan for your hops, you’ll need to select a variety that suits your needs. Different hops will imbue your beer with different properties, including aroma, flavor and bittering. Your best bet is to find a beer, micro brewed or not, that you admire and research the hops used in it. Many brewers carefully safeguard their exact formulas, but you can do your best to replicate it with a bit of research.
With your goal in mind, find out what best matches your taste and also check with your supplier about their organic status, including the use of OMRI Listed® products during production.
 If you’re a home-brewer, then you can go organic by growing
 your own hops in your own garden.
Plant and Care for Organic Hops
With your rhizomes in hand, you can begin preparing to plant and grow hops. These plants grow as vines, so you need to have a few specific conditions met prior to sowing the rhizome.
- Hardiness Zone – Hops grow best in Hardiness Zones 5 through 9, but do well in most moderate climates. Some varieties are made to be heat-resistant, which opens up additional hardiness zones for growing hops.
- Planting Location – Pick an area that can support a trellis of some kind while providing southern exposure. The soil should be well-drained and have a pH of 6.0 to 8.0. You can also grow hops in a large pot, but don’t expect to move those containers once the vine takes off.
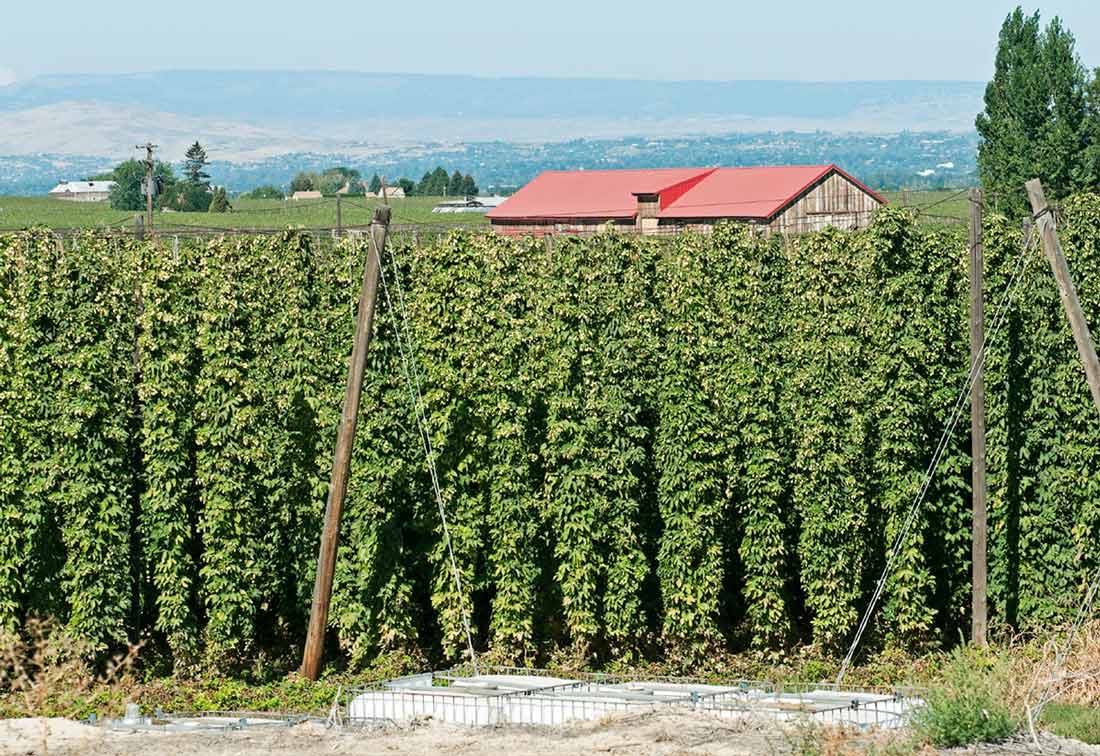
- Trellis – There are plenty of options for constructing a trellis, but the most important thing you should know is that a hop vine can grow up to 30 feet tall, so be sure to consider that. Commercial growers often install poles for the vines to climb. If you have a two-story home or barn, you could install eye hooks along a roof overhang and run twine down to the plants.
- Planting procedure – Dig holes about 1 foot deep for each rhizome and apply TruBone+ to provide early nutrients and include compost on a 1:1 mix with a standard garden soil blend. Plant about 5 feet from other hop rhizomes to keep the two vines from tangling. Rhizomes should be situated vertically when covered. Keep the soil evenly watered without drenching.
- Vines – When your vines reach about 1 foot long, begin to wind them around your trellis in a clockwise direction. From there, you can expect them to grow up to a foot per day during ideal conditions.
- Shoots – Each rhizome will send up several shoots. Once you’ve picked one to allow vining, cut all the others as they emerge.
- Watering – In their first year of growth, your hop plants will have a minimal root system. With that in mind, don’t allow them to stay dry for too long. You may have to mulch the surface to help retain moisture. Be warned though – too much water will cause the rhizomes to rot, so closely monitor the moisture level.
- Fertilizing – As hops begin producing foliage, they extract a lot of nutrients from the soil, especially in the first season. A liquid fertilizer such as TruAmino+ can deliver the nitrogen the plant is craving. Compost can also be added for additional nutrients.
Diseases and Pests Facing Hops
Hops can face numerous problems through their summer-long growing season.
- Mildews – Downy mildew and a powdery mildew specific to hop plants can hit vines with poor airflow. Apply OMRI-Listed® Safer® Brand Garden Fungicide to control these fungal diseases.
- Aphids – In regions where intense hop production takes place, the hop aphid can endanger these plants. Apply an insecticidal soap to these invaders.
- Beetles – Japanese beetles can be a problem on hops, but it’s easy to lure them away with a Japanese Beetle Trap to disrupt that bug’s reproductive cycle. Remaining beetles can be sprayed with a pyrethrin and potassium salt solution that’s approved for use in organic production.
Harvest Your Hops
 The first year of growing hops will likely be a wash when it comes to harvest time since the plants are still establishing themselves. By the third year, these perennial plants will really start to produce good harvests.
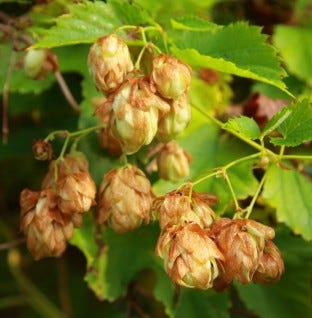
Depending on your weather, your mature hops will be ready in August or September. The cones show they’re ready for harvest by browning on the tips of their scales. That’s when you can pull your vines down and allow them to dry out. Doing so will allow the sap to seep back into the root areas for winter storage.
Once the vines dry out, pick the cones and dry them out separately – often a food dehydrator will do the trick.
With your hops ready, you’re all set to brew your very own, home-grown organic beer!
How Are Your Hops Growing?
Looking to grow your own hops this season? Let us know about your efforts growing hops and show off pictures of your progress the next time you visit Safer® Brand on Facebook. We would love to see how you’ve set up your trellis and how your hops are growing.
For more gardening ideas and special announcements from Safer® Brand, join us by subscribing to our E-Newsletter.


