Our goal is to provide you with products and knowledge to make growing fun, easy, and ultimately successful. Cloning a plant might seem like a scientific feat but, unlike cloning animals, it is something anyone can do! You can start your next crop by using the plants you already own! Read on to learn more about how to clone plants so you can give it a try!
1. Select a Plant
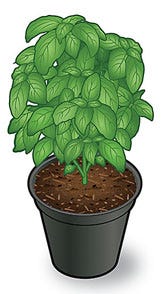
Pick a healthy plant that’s been through one growth cycle and then, after harvest, added at least 6 inches of new growth. Keep the plant well watered, but don’t feed it for three days before you plan to cut it.
Check your plants for fungi or unwelcome insects. Making sure the plant you select is free from troublesome insects and fungi can mean the difference between a successful cloning or a failure.
2. Slice a Cutting
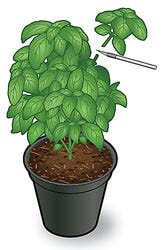
Use a sharp utility knife to cut a leaf stem from the middle of the plant. Slice at a 45-degree angle, close to—but not into—the main stem. To keep your existing plant healthy, try not to cut off a piece from the main stem. Use a piece from a smaller, less essential stem.
Always make sure you use a sharp tool when you cut a stem. Clean, tear-free cuts are easier for plants to heal. Ragged and torn edges make it easier for diseases, insects, and fungi to invade.
3. Trim Leaves
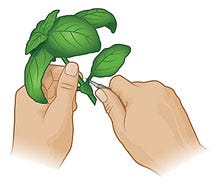 Cut the stem to approximately 4 inches long, again at a 45-degree angle. Carefully trim off leaves that are close to the bottom. Try to minimize tearing when you remove the leaves. In this phase, you want the plant to focus on growing roots instead of healing every scrape.
Ideally, you will be left with a section of the stem with no leaves, which makes it easy to place in a growing medium. Once your cutting is neatly trimmed, place the stem directly into a growing medium, such as nutrient water, rock wool, or coir so it can begin to grow roots.
4. Help Your Plant Take Root
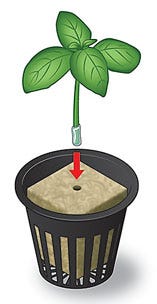
Dip the cut end into a rooting hormone and set in a moistened (not soaked) planting cube. Soakng a plant can make it more susceptible to root rot and other fungi. Be sure the cut end is in contact with the cube so roots will grow into a stable base.
Keep a close watch on your cutting in this phase to ensure the plants never dry out and you should also monitor the health of your plants on a daily basis.
5. Mist Cuttings
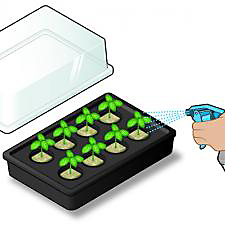
Put the cubes in a plastic tray, mist them, and cover the tray with a clear lid. Set them 2 to 3 inches below fluorescent lights. For best results, mist daily.
The daily misting and keeping your cutting covered provide a humid environment that encourages growth. This will boost your plants' abilities to grow successfully.
6. Watch Their Progress

Leave the lights on for 18 hours a day to simulate natural outdoor conditions. As the plants grow taller, raise the lights so they remain about 2 to 3 inches above the plants. This encourages plants to grow like they would naturally.
In about 10 days, the cuttings will have developed roots. At this point, you can then remove the lid, but make sure to keep the cubes damp so they can take in nutrients.
7. Transplant
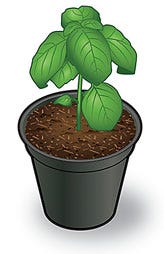 When you see a root ball forming below the cube, your clones are ready to be moved to another pot! Carefully move your plants from their plastic tray and deposit them gently into a pot or container of your choosing! Treat this developing cutting like you would any other plant and continue to water and nourish it regularly.
Protect your clones from their enemies (diseases and fungus) by sanitizing your blade, cutting surface, and fingers with rubbing alcohol before you start and when you finish each time you use them.
Show Off Your Clones!
How many clones have you attempted so far? Have any other useful tips you want to share? Visit our Facebook page to share your photos, experiences, and more! If you've been bitten by the gardening bug after cloning your first plant, you'll want to check out our learning center for more information, great advice, and many articles to help you on your next undertaking. Signing up for our e-newsletter is another smart way to stay updated on sales, new products, and articles!

